
Speaking of eyebrow tutorial for beginners, for years, eyebrows have been a beauty issue with a variety of trends. After we finally got over the early-2000s super-thin brow, the eyebrow makeup trend has been to make them bigger and thicker.
But first, let’s go over some things you should think about before shaping your brows. How to style your brows is determined by your natural brow shape; not every face shape can pull off the thick brow look.
In this article centred on eyebrow tutorial for beginners, we will discuss how to style your brows based on your personal style and face shape! as well as answer some troubling questions on eyebrows in general.
Which Eyebrow Shape Suits You Best?
First, consider your natural brow shape: how angled is it? Is it thick or thin?
You can then choose a brow design based on that.
We can also utilize a brow-shape reference to choose which brow shape best matches our natural face shape (before contouring haha).
Perfect Eyebrow Shape for Your Face Shape
- Straight – long face
- Curved – Heart and diamond face
- Soft arch – Oval and square
- High arch – Round face
- S-shaped – Square and diamond face.
- Upward – Oval and Square face.
Choosing Eyebrow Makeup
Still, on the eyebrow tutorial for beginners, there are numerous products to pick from, and I will discuss each one below.
But, first and foremost, take note of your brow colour! If you have dark hair, it will be one or two shades lighter, and if you have bright hair, it will be one or two shades darker.
1. Brow pomade
If you prefer a natural look with a bit of Instagram glam, the brow pomade may be a nice option for you.
With a brush, you may apply more cosmetics and use more pressure to achieve the ultimate glam appearance.
Alternatively, for a natural look, use a small amount of product and a smooth, soft application.
2. Brow gel
When you want to keep your natural brow form and don’t want to modify it, this is ideal!
It works nicely with a natural eyebrow finish and also helps to set your brows.
3. Brow pencil
This product is ideal if you have a lack of hair in some parts of your brows or if you need to conceal a previous tattoo.
However, in order to blend this product properly, a brow brush is required.
4. Brow powder
I don’t recommend using this product on its own; instead, I think it works best when combined with a brow pomade or brow pencil.
Because it gives a natural finish, but if you don’t have a naturally defined shape on your brows, you won’t obtain a decent outcome using it alone.
However, using a brow powder in conjunction with a brow pencil is advantageous!
After you’ve defined your brows with the pen, use the brow powder to set them and give them a more polished appearance.
5. Concealer
It is critical to clean and enhance your brows with concealer or an eyebrow highlighter pencil.
To achieve better results, I recommend using a liquid concealer and only a small amount of product.
6. Eyebrow brush
If you’re using brow pomade or powder, you’ll also need a brow brush. It must be flat, thin, and have an ankle end.
Please avoid using a brush with an ankle end that is flat but not thin or flat enough, since this can impair the overall definition of the brow form.
How Do You Choose an Eyebrow Color?
- First, determine your hair colour.
- If you have ombre hair, you should emphasize the darker tone of your hair.
- You can use your natural hair colour if you have a Fantasy colour.
With all that said, I think it’s high time we dive into the actual reason while we are here in the first place, which is an eyebrow tutorial for beginners.
Eyebrow Tutorial For Beginners By Iya Magazine
You can watch the video above to follow along, but we’re also breaking down and laying out the entire stages for this brow lesson for beginners. The goal here is to improve the colour and shape of your natural brows.
You’ll be using an eyebrow pencil and eyebrow gel for this instruction. There are numerous brow makeup options available, ranging from pomades to powders and everything in between, but we like the pencil and gel for producing instant and effortless arches. Now, play the video and follow along with this eyebrow tutorial for beginners steps.
Step 1: Begin with a Blank Slate
To begin, make sure you have a clean slate, i.e. a clean complexion. After you’ve finished applying your face makeup (foundation, concealer, blush, and highlighter), it’s time to tackle your brows. As a general guideline, you should apply your brow makeup after you’ve finished your face makeup but before you apply your eye makeup.
Step 2: Brush Upwards
Starting with clean brows, brush through them in short, upward strokes with the spoolie end of the L’Oréal Paris Brow Stylist Definer Waterproof Eyebrow Mechanical Pencil or any other one of your choice. When selecting the best brow pencil for you, select the shade that most nearly resembles your natural brow hairs.
Also Read; 5 Ways To Make Foundation Look Beautiful
Going too light will result in the pencil not showing up, and hence the desired effect will not be achieved. Choosing a pencil that is a shade or two too dark, on the other hand, will look unnatural. Spend a few additional minutes looking for a colour that matches!
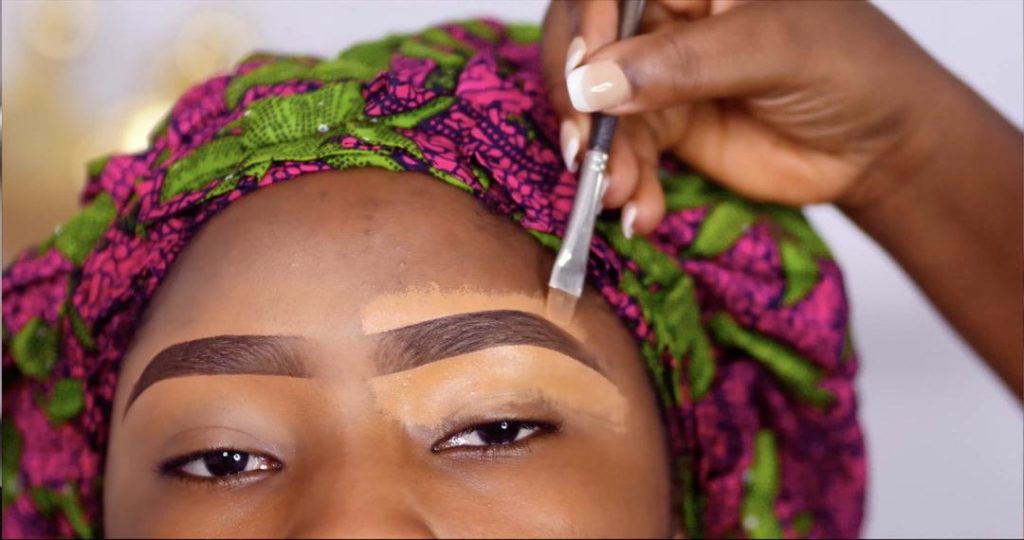
Step 3: Sketch + Fill
Next, use the pencil end to outline the natural curve of your brows. When you’re defining your brows, focus on the arch area, since this can help instantly open up your eyes.
Gently glide the pencil through your arches, through the tail, and along the top of the brows. After you’ve drawn an outline, apply the L’Oréal Paris Brow Stylist Plumper or any other brand’s product of your choice to fill in your brows for a smooth finish, focusing on any sparse areas.
Use the comb to sweep the product through your brows and blend everything for a flawless finish. Voila! That’s all there is to it when it comes to enhancing your brows for an even greater beauty look.
Editor’s note:
Filling in your brows is sometimes not as easy as it looks—we get it. As a result, it’s better to be thoroughly prepared and aware of what you’re getting yourself into, as well as the most typical errors people make.
Step 4: Finish Off Your Eye Makeup
Once you’ve got your brows in place, it’s time to go on to apply the remainder of your eye makeup look! This section is fully customized and up to you: eye shadow, eyeliner, and mascara.
5 Other Eyebrow Tutorial For Beginners

After you’ve mastered the fundamental form and fill, you might be feeling ready to step up your brow makeup game. Of course, there are several other brow makeup tutorials, tips, and tricks to add to your beauty arsenal.
1. Eyebrow Tutorial For Beginners – Contoured Brows
The contouring fad isn’t limited to the face (and body). The same principle of highlights and shadows may be applied to your brows to make them more defined and dramatic.
Simply said, this brow makeup style entails sculpting your brows into their ideal form with lighter and darker eyebrow makeup shades—great for a night out or special occasion.
2. Eyebrow Tutorial For Beginners – Lighten Up
Bleached brows are a popular makeup trend right now, but truly bleaching your natural brow hairs needs considerable dedication—not to mention, who knows if you’ll like the ultimate effect!
For those who are fascinated about the bleached brow look, we have good news: you may brighten the appearance of your brows without using bleach. With the appropriate eye makeup, you can experiment with different brow colours without committing.
3. Eyebrow Tutorial For Beginners – Metallic Brows
Our obsession with metallic beauty colours extends beyond eye shadow and highlighter. Yes, metallics can be used to create a stunning brow look—and luckily for us, all, the metallic brow cosmetics craze is greater than ever.
4. Eyebrow Tutorial For Beginners – Longwear
This is more of a feature than an eyebrow makeup look, but it’s absolutely worth mentioning. Sometimes you want (need) your brow makeup to last against the elements for as long as possible without smudging or spreading. Fortunately, we’ve developed an eyebrow gel that lasts and lasts.
We’re talking about the L’Oréal Paris Unbelievabrow Longwear Waterproof Brow Gel, which fills and thickens brows quickly. There are also other products available that you can use if L’Oreal is not readily available to you.
This sweat-resistant, waterproof product will also not transfer onto your clothes, making it the ideal brow makeup option for those long days and nights when you need your makeup to last.
To use it, start by using the doe-foot applicator to fill up sparse areas. Then, use an angled brush to contour and define your brow shape, and finally, comb through with a spoolie.
5. Eyebrow Tutorial For Beginners – Colorful Eyebrows
Not frightened of a little colour? We’re not either! Colourful brows are one of the most recent eyebrows makeup trends, with many models and actresses adopting the look on and off the red carpet.
We’re talking about vibrant hues ranging from red and blue to green and everything in between. The beauty of colourful brows is that there are so many different hues to select from! After all, why should colour be limited to eye shadow?
FAQs on Eyebrow Tutorial For Beginners
How do you do eyebrows step by step for beginners?
What should beginners use for eyebrows?
How can I do my eyebrows at home?
Conclusion on Eyebrow Tutorial For Beginners
Finally, we’ve approached the very end of this enlightening article on Eyebrow Tutorial For Beginners. At Iya Magazine we are focused on giving you reliable information that solves one or two problems in your everyday life.